Introduction
How to attach a headboard to a bed base? Transforming your bedroom into a haven of comfort and style often starts with the bed, and a headboard plays a crucial role in achieving this. It not only serves as a functional support for reading or watching TV in bed but also adds a touch of elegance and personalization to your sleeping space. Attaching a headboard to your bed frame might seem like a daunting task. But with the right tools, techniques, and a bit of patience, it can be accomplished easily. This comprehensive guide will walk you through simple steps to attach a headboard to your bed frame, ensuring a sturdy, professional-looking result.
Understanding Your Headboard and Bed Frame
Identifying Compatible Designs and Attachment Points
How to install headboard? Before diving into the attachment process, it’s essential to ensure that your chosen headboard is compatible with your existing bed frame. Most modern bed frames have pre-drilled holes or brackets designed to accommodate a variety of headboard hacks styles. Examine both your headboard and bed frame for these features:
- Headboard Style: Determine whether your headboard is freestanding, wall-mounted, or designed to attach directly to the bed frame. For this guide, we’ll focus on the latter option.
- Attachment Hardware: Check if your headboard comes with hardware such as bolts, screws, or brackets. If not, purchase suitable fasteners based on the material and design of your bed frame and headboard.
- Attachment Points: Locate the pre-drilled holes or brackets on both the headboard and bed frame where the hardware will be installed. Ensure they align properly and allow for secure attachment.

Gathering Tools and Materials
Ensuring a Smooth Installation Process
How to secure a freestanding headboard? Having the right tools and materials on hand will make attaching your headboard to the bed frame a breeze. Gather the following items before you begin:
- Screwdriver or Drill: A screwdriver or power drill with appropriate bits for the fasteners provided or purchased.
- Measuring Tape and Level: To ensure accurate alignment and a straight installation.
- Fasteners: Bolts, screws, or brackets specified for your headboard and bed frame combination. If unsure, consult the manufacturer’s instructions or consult a hardware expert.
- Wood Glue (optional): For added stability, especially if attaching a wooden headboard to a wooden bed frame.
Step-by-Step Headboard Attachment
Preparing the Bed Frame
Clearing the Workspace and Ensuring Stability
How to attach headboard to bed frame without holes? Headboard how to attach? Begin by clearing the area around your bed, providing ample space to work comfortably. Ensure that your bed frame hacks is level and stable. If necessary, adjust its position or use furniture leveling pads to create a level foundation for the headboard.
Attaching the Headboard
Aligning and Securing the Headboard
How to fix bed headboard? With your tools, materials, and workspace prepared, follow these steps to securely attach your headboard to the bed frame:
- Position the Headboard: Place the headboard against the bed frame, aligning the attachment points on both pieces. Use a measuring tape and level to verify that the headboard is straight and centered.
- Install Fasteners: Insert the bolts, screws, or brackets through the pre-drilled holes on the bed frame and into the corresponding holes on the headboard. Tighten them by hand initially to avoid misalignment, then use a screwdriver or drill to snugly secure them in place. Be cautious not to overtighten, which could damage the wood or weaken the connection.
- Apply Wood Glue (if applicable): For added stability, apply a small amount of wood glue to the mating surfaces between the headboard and bed frame before securing the fasteners. Wipe away any excess glue immediately to prevent staining or damage.
- Double-Check Stability: Once all fasteners are in place, gently rock the headboard to ensure it’s firmly attached and doesn’t wobble. Make any necessary adjustments to the fasteners or bed frame leveling before moving on.
Finishing Touches
Securing the Bed to the Wall (optional)
How to attach headboard to wooden bed frame? For additional stability, particularly with heavy or tall headboards, consider securing the bed frame to the wall using furniture anchors or wall straps. Follow the manufacturer’s instructions for the specific product you choose, being mindful of any wiring or pipes behind the wall.
Decorating and Enjoying Your New Headboard
Now that your headboard is securely attached to the bed frame, it’s time to add the finishing touches and enjoy your transformed bedroom. Dress up your bed with coordinating bedding, pillows, and throws, and consider adding complementary lighting or wall decor to enhance the overall aesthetic.
In conclusion, attach headboard to bed base is a straightforward process that can greatly enhance the comfort, functionality, and style of your sleeping space. By understanding your headboard and bed frame, gathering the necessary tools and materials, and following these step-by-step instructions, you can confidently tackle this DIY project and create a beautiful, personalized bedroom retreat.
Additional Tips and Considerations for a Seamless Headboard Attachment
- Custom Modifications: If your headboard and bed frame do not have compatible attachment points, you may need to make some custom modifications. Consult a professional or experienced DIY enthusiast for guidance on drilling new holes or installing brackets to ensure a secure fit.
- Headboard Height Adjustment: Some headboards offer height adjustability to accommodate different mattress thicknesses or personal preferences. If your headboard has this feature, follow the manufacturer’s instructions to set the desired height before attaching it to the bed frame.
- Protecting Your Flooring: When working on attaching the headboard, lay down a protective covering (such as a drop cloth or old blankets) to safeguard your flooring from scratches, dents, or spills.
- Working with an Assistant: Enlist the help of a friend or family member to hold the headboard in place while you attach the fasteners. This will make the process easier and ensure proper alignment during installation.
- Maintenance and Care: Regularly inspect the attachment points and fasteners to ensure they remain tight and secure over time. If you notice any looseness or wobbling, retighten the fasteners as needed. For wooden headboards, periodically check for signs of wear, cracks, or splitting, and address any issues promptly to maintain structural integrity.

Upgrading Your Headboard Attachment: Creative and Stylish Solutions
Can any headboard attach to a bed frame? Beyond the standard attachment methods, consider these creative options to elevate your securing headboard to wall and bedroom design:
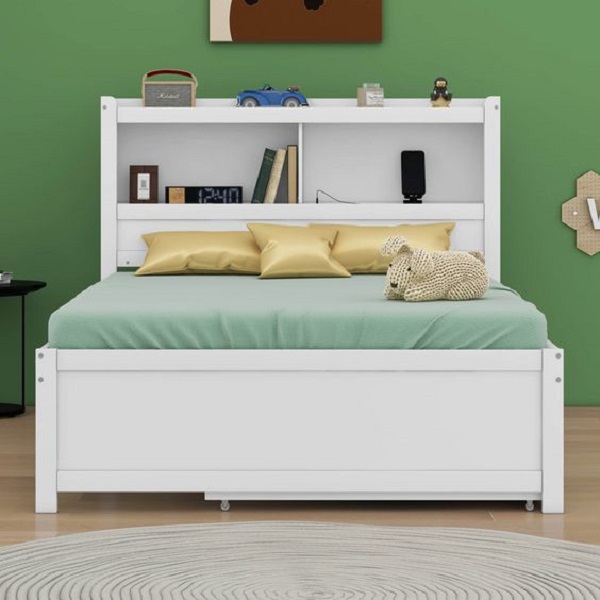
- Headboard with Storage: Opt for a headboard with built-in shelves or drawers for added functionality and storage space.
- Upholstered Headboard: Choose an upholstered headboard for a luxurious and comfortable feel. These headboards often come with their own mounting system or can be attached using standard methods.
- DIY Headboard: Create a unique and personalized headboard using reclaimed wood, fabric, or even an old door.
- Decorative Wall Panels: Use decorative wall panels to create a headboard-like effect. This option adds visual interest and texture to your bedroom.

Enhancing Your Headboard with DIY Touches
Once your headboard is securely attached, consider adding some personal touches to make it truly your own:
- Add Trim or Molding: How to fix headboard with trim or molding for a more finished and polished look.
- Paint or Stain: If your headboard is unfinished, paint or stain it to match your bedroom decor.
- Attach Fabric: Use fabric or wallpaper to cover a plain headboard and add a pop of color or pattern.
- Add Lighting: Install wall sconces or pendant lights above your headboard to create a cozy and inviting atmosphere.
Headboard Care and Maintenance
How to install headboard? Once your headboard is attached, proper care and maintenance will ensure it looks its best for years to come.
- Dust Regularly: Dust your headboard regularly with a soft cloth to prevent buildup.
- Clean Stains Promptly: Address any spills or stains immediately to prevent them from setting.
- Vacuum Upholstered Headboards: Use a vacuum cleaner with a upholstery attachment to remove dust and debris from upholstered headboards.
- Protect from Sunlight: Direct sunlight can fade fabric and wood finishes, so position your bed to minimize exposure.
Enjoy the added style, comfort, and personalization that your new headboard brings to your sleep space!